Monitoring & proctoring

Real-time monitoring, proctoring, and live chats

Created by Mustafa Ekim / January, 2023

The monitoring and proctoring features provide complete control to test administrators during the assessment process.

Assessment process monitoring

The monitoring process includes:

  1. Identifying candidates who have logged in for the assessment
    1. Determining who has initiated the test
      1. Tracking their progress during the test
        1. Identifying candidates who have completed the test.

          Testinvite gathers and integrates diverse data sources in real-time, allowing for a complete comprehension of the assessment process and enabling timely and targeted action.

          Classifying candidates to simplify administration.

          If you are administering an assessment to a large number of candidates, it is advisable to categorize them for easier administration. By using groups and labels, you can classify your candidates into smaller sets. A candidate can belong to one group, but can be assigned multiple labels. Ensure that you categorize your candidates appropriately using both attributes.

          The candidates panel, test sessions panel, and proctoring panel permit you to apply group and label filters, enabling you to concentrate on a small group of candidates at a time.

          The candidates panel enables you to apply filters based on candidate registration dates, groups, labels, stages, and ratings.
          The candidates panel enables you to apply filters based on candidate registration dates, groups, labels, stages, and ratings.

          Categorizing candidates also promotes collaboration among multiple test administrators, as each administrator can be accountable for monitoring and proctoring candidates in a particular group or with specific labels.

          Monitoring the candidates' progress during the assessment

          The candidates panel presents the necessary information to determine which candidates have logged into the assessment, whether they have initiated the test, and the number of tests they have completed  within the assessment.
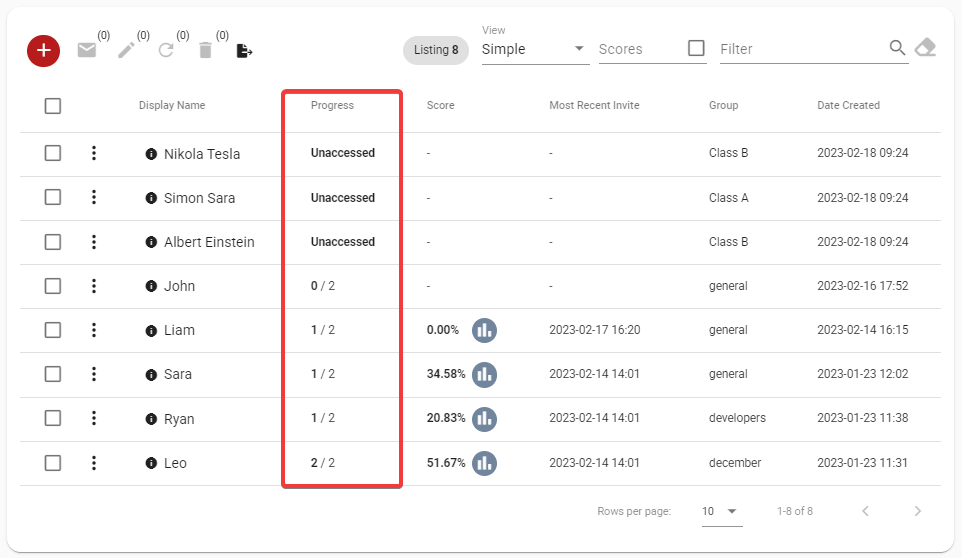
          The progress column offers information on the candidate's advancement in the assessment.
          The progress column offers information on the candidate's advancement in the assessment.
          • Unaccessed indicates that the candidate has not yet accessed the assessment.
            • The numbers, such as 0/2, indicate the number of tests the candidate has completed, as well as the total number of tests in their assessment.

              Locating candidates who have initiated a specific test

              Progress columns concentrates on the number of tests completed. If you would like to figure out who have initiated a test, you can select either select all or a particular test you are interested through the Scores option in the toolbar.

              Upon selecting the tests, the candidate panel will display the status of each candidate for each test selected.
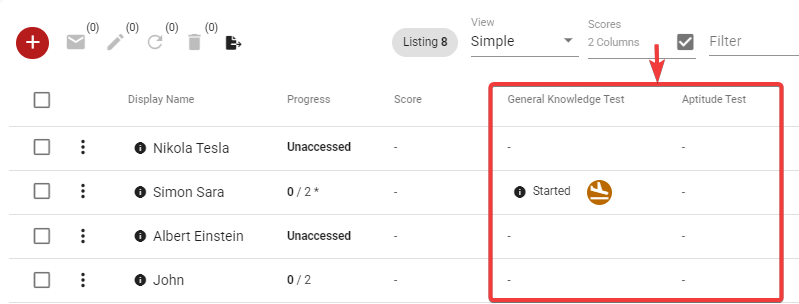
              John has accessed the assessment, but has not initiated any tests. Albert has not accessed the assessment. Simon have begun the
              John has accessed the assessment, but has not initiated any tests. Albert has not accessed the assessment. Simon have begun the "General Knowledge Test".

              Monitoring test sessions

              To monitor test sessions, you can switch to the Test sessions panel via the top toolbar in the Task Manager. The search panel enables you to filter the test sessions using multiple filters.
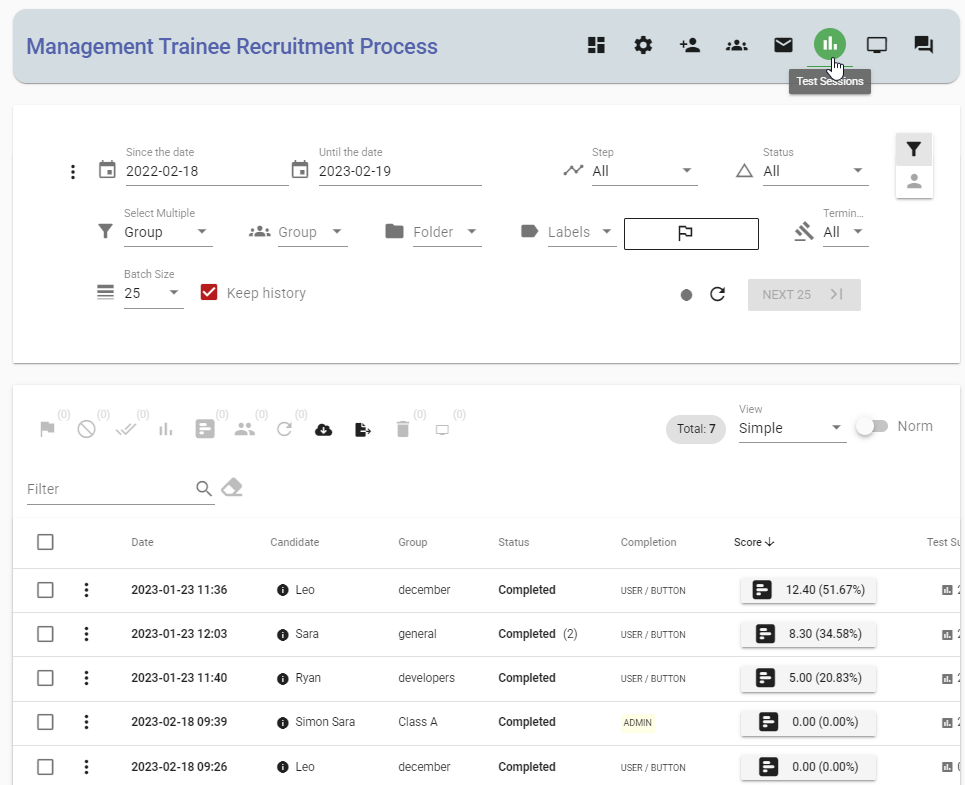
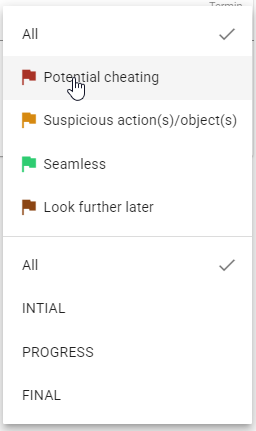
              The search panel for test sessions

              • Filter by test session creation dates: You can filter tests by specifying a date range so that the test sessions that began within that period are displayed.
                • Filter by group or labels: You can filter test sessions of candidates belonging to a specific group or having specific labels.
                  • Filter by steps: The test sessions panel exhibits all the tests within the assessment by default. To filter the test sessions associated with a particular step in your assessment, use the Step filter in the search panel.
                    • Filter by statuses: You can filter the test sessions by their current statuses by choosing from the options of Started, Completed, or Reinstantiated.
                      • Filter by termination type: You can filter the test sessions by their termination method and also filter out test sessions that have not been fully completed, meaning that the test-taker has not visited or submitted all the pages of the test.
                        • Filter by flags: You can filter test sessions that have been flagged. Additionally, you can filter test sessions by their proctoring statuses, which include initial state, progress state, and final state.
                          <br>

                          Real-time monitoring of test session progress

                          Testinvite offers a real-time monitoring panel that enables live connectivity with test sessions. The panel provides up-to-date progress information for each test session in real-time.

                          To launch the real-time monitoring panel, click on the "Real-time monitoring" button located in the top toolbar of the Task Manager.

                          To initiate a real-time connection with the relevant test sessions, the real-time monitoring panel necessitates the selection of either groups or labels.

                          Once you have identified the groups or labels, clicking on the Connect button will initiate the live feed.
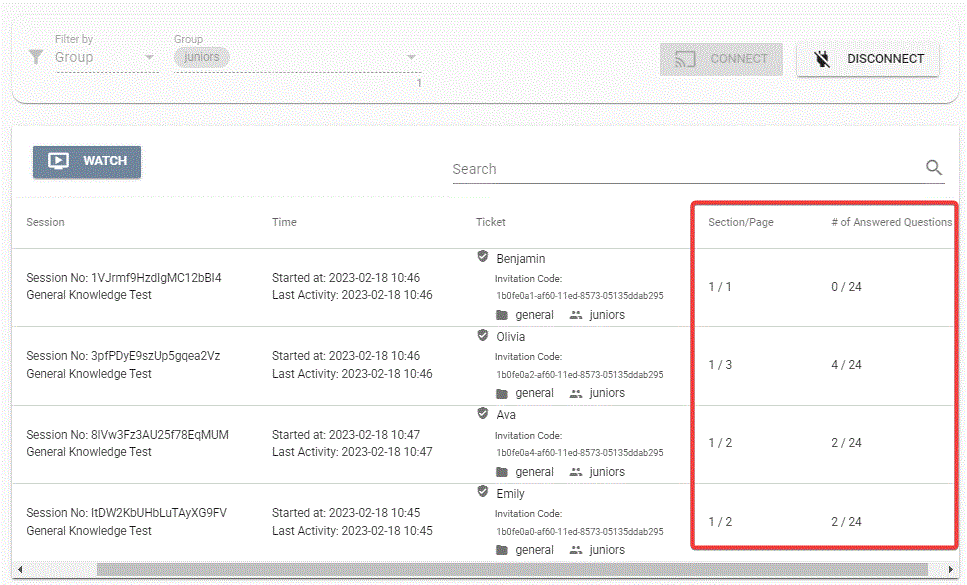
                          The Section/Page columns show the current section and page of each test session, while the # of Answered Questions column indicates the number of questions answered in each test session.

                          The numbers are dynamically updated in real-time, eliminating the need for manual page refresh.

                          Proctoring test sessions in real-time

                          Test sessions can be supervised by viewing the webcam and screen streams. You can select the test sessions and click on the Watch button to start a live proctoring session.
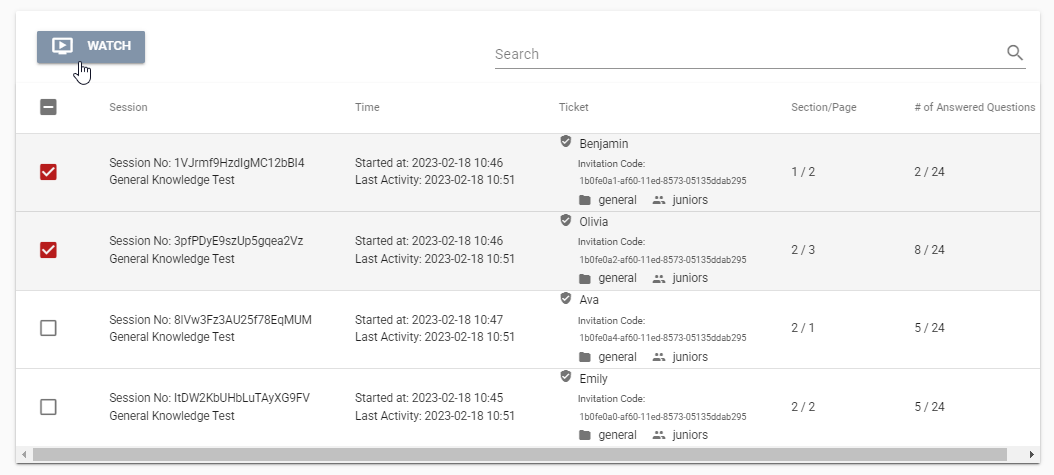
                          The live proctoring session will automatically stream the webcam and screen feeds, enabling you to monitor both in a single view.
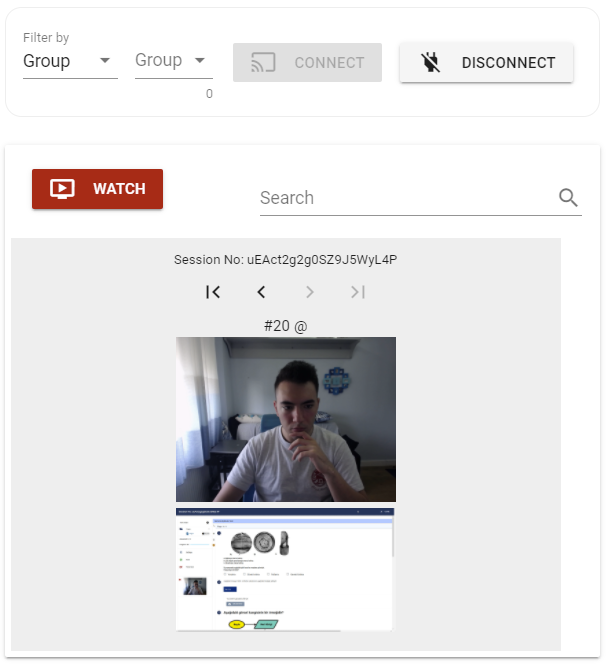
                          Live proctoring allows for the live streaming of both the screen and webcam of each test-taker.
                          Live proctoring allows for the live streaming of both the screen and webcam of each test-taker.
                          It is recommended that a single proctor supervises between 30 to 50 test-takers, depending on the capacity of the computer.

                          If you intend to monitor a considerable number of test-takers in real-time, ensure that you divide them into smaller sets using groups and labels. This way, a single proctor can be responsible for supervising less than 30/50 test-takers at a time.
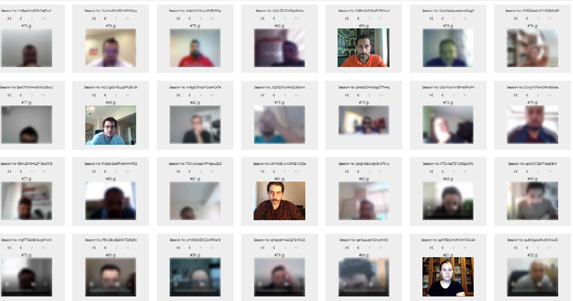
                          The real-time proctoring panel. The webcam visuals of some of the test-takers have been blurred to protect their rights.
                          The real-time proctoring panel. The webcam visuals of some of the test-takers have been blurred to protect their rights.

                          Post proctoring of completed tests

                          Post-proctoring panel is similar to the live-proctoring panel, but it allows test administrators to proctor only the completed test sessions.

                          To access the post-proctoring panel, go to the test sessions panel in the Task Manager, select the completed test sessions that you want to proctor, and then click on the post-proctoring icon.
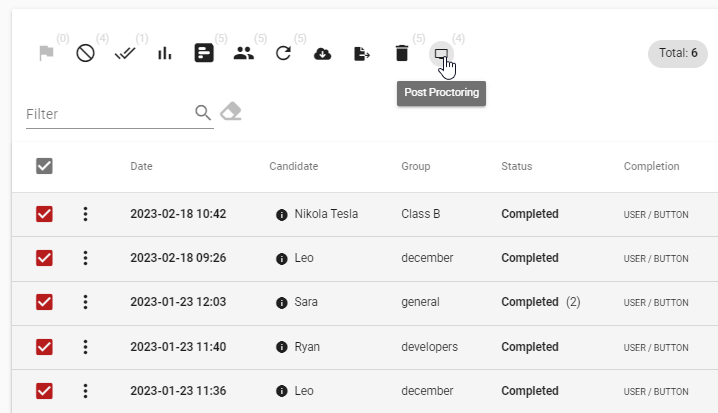
                          The post proctoring panel provides a time-efficient way to proctor test sessions that may have taken place on different dates and times.
                          The post proctoring panel provides a time-efficient way to proctor test sessions that may have taken place on different dates and times.

                          Live chat with test-takers

                          You have the option to activate the live chat feature for your entire assessment, which allows test administrators to communicate with test-takers.

                          To activate live chat, access your Task settings, navigate to the Miscellaneous panel, and choose the Private chat option.

                          The live chat feature is activated for the entire assessment, encompassing all tests within it.

                          Options for initiating a chat session

                          When the live chat option is activated, test administrators can initiate a live chat with any test-taker.

                          Allowing candidates to initiate chats

                          Similarly, you can configure the chat settings to specify whether candidates are permitted to initiate a chat session and the stages of their assessment process when they can do so, including:
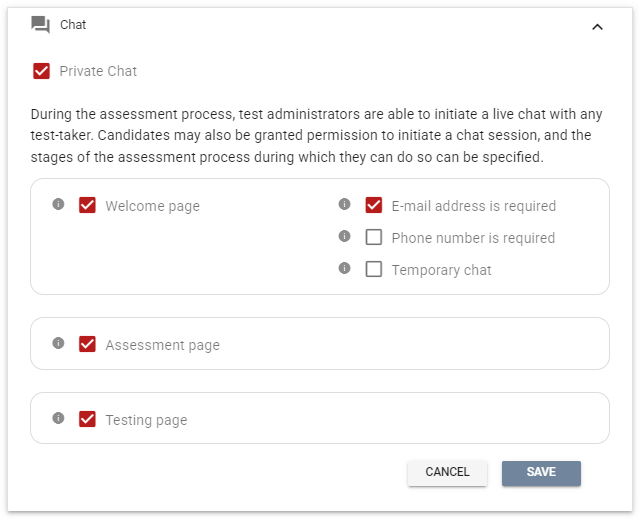
                          1. The welcome page, where they have not yet logged into the assessment by providing their credentials
                            1. The assessment page, where the tests inside their assessment are displayed
                              1. The testing page, where they are taking the test.
                                As candidates who are at the welcome page have not yet authenticated, it is possible to require them to submit their email address or email when initiating a live chat.
                                The Temporary chat option is useful when multiple test-takers will be using the same computer, as it prevents chat sessions from being stored in the local storage of the web browser. However, this option may not be ideal for test-takers who are using their personal devices to access the assessment, as chat sessions will be cleared when the browser is refreshed or the page is changed.

                                Initiating a chat session with a test-taker

                                To commence a chat session with a test-taker, you can navigate to the candidates panel, select the menu button located next to the relevant candidate, and click on Chat.

                                The process for candidates to start a chat session

                                If candidates are permitted to initiate a chat, a Chat button will be included on the pages that you configure, allowing them to click it and start a chat session.
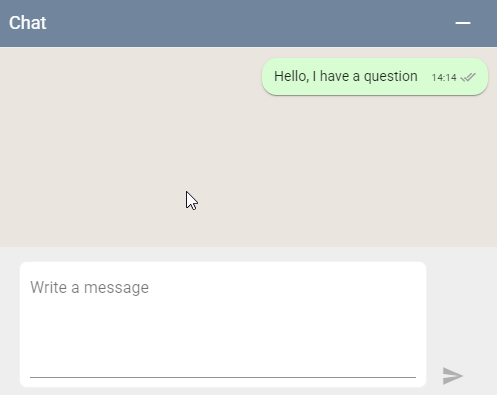
                                The process for test administrators to respond to chat sessions

                                The test administrators can respond to chat sessions by connecting to the chat server in real time. To do so, they should click on the Chat button located in the top toolbar of the Task Manager, and then click on the Connect button.
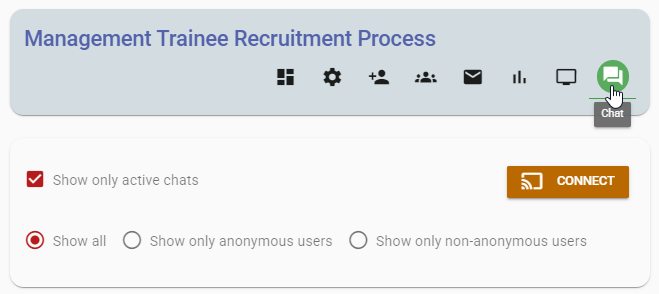
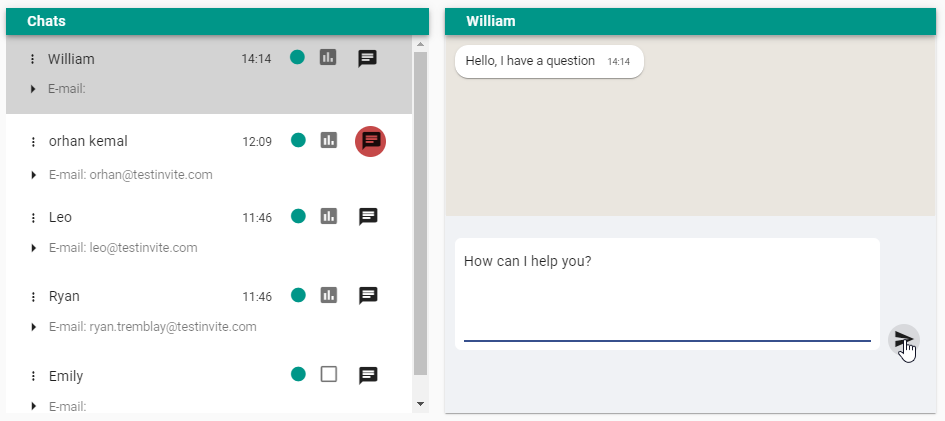
                                The chat panel for administrators displays all active chats and enables administrators to respond to any chat session.
                                Author

                                Mustafa Ekim

                                Mustafa Ekim, founder of TestInvite and QuizCV, brings nearly a decade of expertise in building online assessment platforms for custom, secure tests.
                                Go Back
                                Talk to a representative
                                Figure out if TestInvite is a good match for your organization